1995 Mazda Miata With 350z Motor Swap - Unfinished Project on 2040-cars
Spring Branch, Texas, United States


|
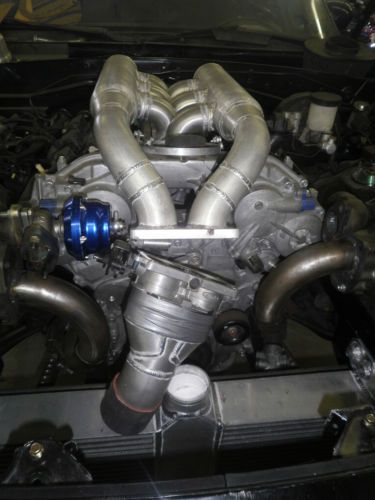
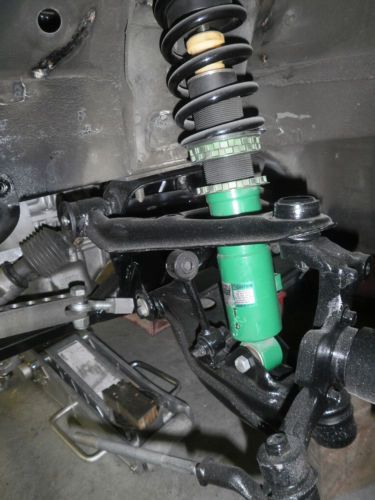
This is an unfinished project. The car does not run and needs someone to finish this project. It is a 1995 Mazda Miata with a Nissan 350z motor, TEC3 engine management, full rollcage, TEIN shocks with EDFC, Nissan LSD, Kodiak Racing 3 piece lightweight 17" wheels (front and rear) and two 15" wheels with slicks, Wilwood brakes, body kit that is custom molded together so rear and front bumpers are molded into the side panels, and lot's of other custom aftermarket parts such as headlights, gauges, etc.
You will need to make arrangements to pick up or have the car shipped to you. You will be dealing with Bell Engineering. The car is located at: Bell Engineering 203 Kestrel Drive Spring Branch, TX 78070 (830) 438-2890 corky@bellengineering.net Google Bell Engineering and go to their website. Click "Current Projects" link under "In The Shop". Click on "1.8L Miata w/ 350Z Motor". I'm sorry but Ebay does not allow me to provide links. For more pictures of the project please send me a message. Ebay does not allow me to provide links to my photo album. These are the stuff Bell Engineering did. 1. Motor and transmission. Labor Labor for 17 hours for work done thru Oct. 15, 2008. Uncrated and disassembled motor, drive train, modified engine bay for motor to fit, working on mounting transmission, steering rack and subframe. |
Mazda MX-5 Miata for Sale
 1991 mazda miata se convertible 2-door 1.6l. drive anywhere.
 1992 mazda miata mx5 with a automatic transmission, and hardtop(US $5,500.00)
 *sport edition 2.0l automatic new tires clean history report clean southern car*(US $13,350.00)
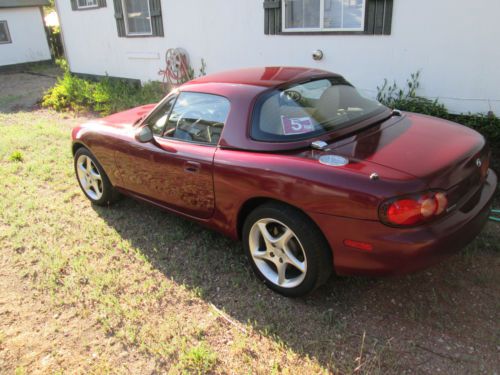 2003 mazda miata ls with hardtop!(US $6,250.00)
 2004 mazda mx-5 miata ls convertible 5-spd leather bose texas direct auto(US $9,780.00)
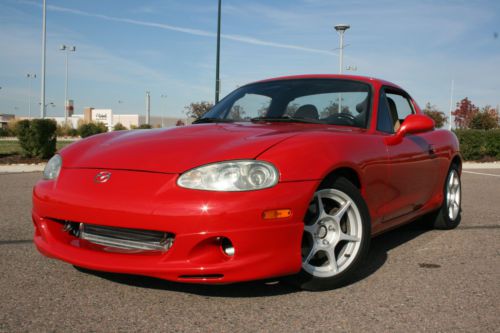 2001 mazda miata se turbo
Auto Services in Texas
Yang`s Auto Repair ★★★★★
Wilson Mobile Mechanic Service ★★★★★
Wichita Falls Ford ★★★★★
WHO BUYS JUNK CARS IN TEXOMALAND ★★★★★
Wash Me Down Mobile Detailing ★★★★★
Vara Chevrolet ★★★★★
Auto blog
Mazda ad showing Facebook updates while driving criticized by Senate committee [w/video]
Sat, 08 Feb 2014Senate Commerce Committee Chairman Jay Rockefeller, D-WV, held an all-day summit on Thursday to discuss the dangers of using modern technology while driving, during which an ad that Mazda aired during the Super Bowl was used as an example of the worrisome future towards which we're headed. While seemingly innocuous at first glance, the ad, which can be seen below, shows a brief glimpse of a driver using the Mazda Connect infotainment system in a Mazda3 to check/update his Facebook page while driving down the road.
Officials from major communications companies like Samsung, Google and Apple attended the summit, as well as representatives from automakers including General Motors and Toyota. A representative from Mazda was not present despite the company's own currently available technology being used as the poster child for the issues being discussed.
According to Automotive News, Senator Rockefeller warned the automaker and communication execs on hand that he will propose legislation to regulate the use of technology while driving if they don't work together to implement their own standards more quickly. Michael Robinson, GM's vice president of sustainability and global regulatory affairs, argued that his company has had distracted driving guidelines in place for 15 years since the advent of its OnStar system, noting that the technology in question has also helped the automaker save lives through automatic crash detection and calls to 911.
2015 Mazda2 spotted in Japanese magazine
Tue, 16 Jul 2013The styling changes at Mazda are proceeding at a fairly quick tempo. The CX-5 was unveiled, followed by a refreshed CX-9, the excellent Mazda6, and most recently a new Mazda3. This all happened over the course of less than two years, which in the auto industry is like a long week.
Now the Mazda2 is getting its revamp. Thanks to a magazine scan from Japan, we now have our first look at the new sub-compact, called the Demio, in its home market. Mazda's familial front end has been fitted, and it doesn't look quite as suited to the smaller car. Lacking the long-hood look of the Mazda3 and Mazda6, the new styling looks overly rounded, almost bulbous from our angle. It's still attractive, but the shape is kind of off-putting compared to the chiseled faces of the 2's big brothers. We'll concede that the folded magazine page may have something to do with it, however.
The next-generation 2 should adhere to Mazda's Skyactiv philosophy, which means we can expect a highly efficient four-cylinder engine, although it's impossible to say if Mazda will do away with its smallest offering's one-engine strategy. Considering the Mazda2 will be riding on a shortened version of the CX-5's platform, we'd expect some degree of mechanical parts sharing, regardless of how much the larger platform needs trimmed. Perhaps a detuned version of the 2.0-liter, Skyactiv four-cylinder could be under the 2's hood?
2009-2013 Mazda6 door latch recall covers 161k cars
Mon, 30 Sep 2013Mazda is voluntarily recalling 161,400 Mazda6 cars due to door latch mounting screws that may loosen, which could cause a door to open while the vehicle is in motion, thereby increasing the risk of accident or injury. The recall covers 2009 through 2013 Mazda6 models manufactured between February 4, 2008 and August 24, 2012.
The recall is expected to begin by October 18, 2013. Mazda will notify owners, and dealers will provide repairs free of charge. Scroll down for the official recall notice from the National Highway Traffic Safety Administration.